Pages

Wednesday, 26 September 2012

Coconut Oil..


Last week I was in a health shop and I decided to buy Coconut Oil. I bought it solid in a jar and it was only €2 and let me tell you this stuff is AMAZING! I'm actually going to buy another one this weekend because it can be used in so many ways! 

So basically, what makes coconut oil so good for your hair is that its one of the few oils that due molecular structure it can penetrate inside the hair shaft , therefor being able to moisturise and repair the hair. I way prefere this oil to any of my other hair oils and serums at the moment. 


To use coconut oil place the jar of coconut oil into a bowl or sink of hot water for a few minutes for it to turn from soild to liquid. As the oil cools it will turn to a solid again if not used.

The uses of coconut oil are as follows:
  • Use it as a pre-shower conditioner on dry hair. Melt the oil and apply to dry hair, leave for 10-30 minutes (depending on how much time you have) or leave it in over night for a more intensive treatment.
  • Use on your hair after you shower. Apply some of the oil to wet/damp hair after you shower. Apply a small bit at a time or you hair could turn greasy! I found using this on my curly hair made it softer, more ease to manage and gave my curls for bounce.
  • It makes a really nice scrub, which I will show you how to make below :) 
  • It can be used as a massage oil or a body moisturiser.
  • For extra strengthening you can make a coconut oil and egg hair mask. I use this one a week. Our hair loves coconut oil and just soaks it up. 

To make this hair mask-

  1. Melt the coconut oil until its warm (you dont want it too hot or the eggs could scramble!)
  2. Crack in one egg and mix it quickly together (you dont want it too cool as the heat will make it penetrate the hair.) 
  3.  Put a towel around your shoulders and then apply the mask, pay particular attention to the ends and massage it into scalp as coconut can help with dandruff and massaging the scalp encourages hair growth.
  4. Leave in for 30-40 minutes, wash out and shampoo and condition as normal.
  • I have read that a few drops melted/liquid coconut oil on a cotton pad can be used to remove eye make-up, although I haven't tried this myself.
  • Coconut oil can be used as a face moisturiser and is really lovely if used in a DIY facial :) 

To make a Scrub-


You will need:
Sugar 
Coconut Oil
Lavender essence (optional)
You roughly need 2 parts sugar : 1 part oil.

1.Melt the coconut oil in a bowl of hot water.


2. Empty the water from the bowl and pour in some coconut oil.

3. Then add the sugar and a few drops of lavender (you can add a bit of olive oil if you want) Your scrub should look something like this:


Then scoop it out and put it in a pretty jar and leave it in your bathroom :)

Put a bow around this and it makes a lovely handmade gift!
I hope you have found this post helpful , Overall I really like coconut oil and for just under €2 , I would recommend this to anyone :) 

Let me know what you think below!

Thanks for reading :)


Sunday, 23 September 2012

Chocolate & Vanilla Marble Cake..

I absolutely love marble cake as its so simple to make and tastes delicious.
This is my favourite marble cake recipe and is taken from the book 'Bake' by Rachel Allen.
This cake keeps really well and is best served plain or with a hot chocolate sauce and ice-cream.
Serves 6-8.

You will need:

225g (8oz) of Butter , softened
225g (8oz) Caster sugar
4 Large eggs
2 tsp Vanilla extract
225g (8oz) plain flour
2 tsp Baking powder
50ml (1¾ fl oz) Milk
Roughly 50g (2oz) Cocoa powder , sifted

Recipe

  • Preheat oven to 180°C (350°F), Gas mark 4. Butter and flour the sides of the cake tin and line the base with greaseproof paper.
  • Cream the butter in a large bowl or in an electric food mixer until soft. Add the sugar and beat until the mixture is light and fluffy.
  • Whisk the eggs and vanilla extract together in a small bowl. Gradually add the eggs to the butter mixture, beating all the time. Sift in the flour and baking powder and fold in gently to mix, then add the milk and mix gently to combine.
  • Tip in half the cake mixture into another large bowl and into this bowl , fold in the sifted cocoa powder.
  • Place the cake mixture into the prepared tin by alternating spoonfuls of the vanilla batter with the chocolate batter, then with a skewer or knife , gently draw swirls through the cake mixture to 'marblise' it. Don't overmix or you won't have that wonderful marble effect.
  • Bake in the oven for 45 minutes or until the skewer/knife comes out clean.
  • Turn the cake out onto a wire rack and allow to cool or eat warm!


Enjoy!


Leave any comments or questions below :)


Wednesday, 19 September 2012

We Heart It Love..

Cupcakes , Paris and the Olsen twins..


I have found the prettiest pictures on WeHeartIt lately.
I could spend hours just scrolling through pages and pages of beautiful pictures, 
Photography is something that I love and I hope to improve my skills as I blog :)

Here are some of the pictures that I've found.

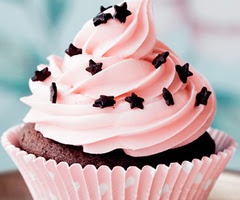
Look how gorgeous these cupcakes are! I hope to bake some cupcakes soon so expect some photos along with the recipe in a few days!

These cupcakes remind me of christmas and hot chocolate :)

This looks so pretty!


Oreos


I am actually in love with Mary-Kate and Ashley hehe.
They have such amazing style and they have perfect messy/boho hair.
Oh how I wish I was an Olsen! 


Their hair looks amazing here!


Paris..


And Finally , 


Thanks for reading :)
Hope you are having a lovely week , 
Leave any comments or questions .. I'll reply!


Monday, 17 September 2012

Ombre Obsession..

Once again,  I am absolutely loving ombre hair , I think ombre has been everywhere the past couple of years since various celebrities have been trying out the sunkissed look , including Drew Barrymore , Khloe Kardashian ,  Jessica Biel just to name a few :)

For those of you who dont know what ombre is heres some info.
In french une ombre means to shadow or shade.
Ombre is the term used to describe the gradual lightning of the hair strand.
It is recommend that this technique is done by a professional to achieve the desired effect and also this look requires bleach which is very damaging to the hair.
Other names for this technique includes dip-dye , smudged or balayage (although there is a sight difference between balayage and ombre which I will explain below)

Balayage is a technique where the majority of the brush strokes are 'painted' vertically down the hair shaft and usually only to the front of the hair creating natural sunkissed highlights.
Warning: This should be done by a professional with experience and knowlage of using the balayage technique as if not done correctly the highlights can appear 'chunky' and obvious.

These are just some of my favourite of the (many) images I have saved to my computer of ombre hair.

This must be one of my favourite pictures of ombre hair


I just love how Boho and effortless ombre hair looks , this a really low maintenance colour as you dont need to touch up your roots ever few weeks :) 
Personally I prefere ombre hair with Curly/Wavy hair as it looks more gradual and beachy.

I hope you found this post helpful if you are considering getting an ombre.

Just a bit of advice if your are considering ombre:

This look will damage your hair as bleach is involved, so i would recommend investing in a good hair mask or using olive oil as a deep conditioner , and to give your hair a break from heated styling tools.
Also the blonde can go quite brassy so it might be worth your time to buy a purple shampoo to counteract the brassy-ness :)

All of these images have been found on google images , Pinterest or We Heart It 

Anyways , I hope you enjoyed reading my blogs and please leave any comments or questions below :)
Let me know what do you think of ombre ? Love it or Hate it ? 


Sunday, 16 September 2012

MUA Makeup Academy / Sleek contour kit Review..


While I was in London , I decided to make the most of having a huge superdrug , and bought a few MUA products and the sleek contour kit. Overall I really like these products - with an eye palette only £4 who wouldn't love it ?

I was really excited to try out some MUA products as I had heard so many great reviews about their Heaven & Earth palette, and I must say I am now a huge fan!
The colours in this palette are AMAZING and really wearable if your not a fan of bold eyeshadow. The eyeshadows are easy to blend and I find the colours are really pigmented when applied with your finger or the brush that comes with it , although when i tried to apply it using my own eyeshadow brush , it wasn't as good. So I would recommend to apply using your finger and then to blend using your own brush :)


MUA Eyeshadow Palette in Heaven & Earth £4.
I then bought the Glamour Nights eyeshadow palette.
The quality of this palette is similar to that of the Heaven & Earth only 1 colour disappointed me , the white. Other than that , this is a really great palette and i adore the Green , Purple and Crimson/Hot pink colours. 

Glamour Nights £4.
After that , I bought the MUA blusher in shade 1 and pressed powder in shade 2.

I really like the colour of the blush as its a soft pinky colour with a slight gold sheen to it as i think it goes really well with my skin tone, the only fault i have with this product is that the texture is bit chalky. But for £1 its a great product and i will defiantly be buying the other colours next time I'm in superdrug.

Blusher in shade-1.
£1
I haven't been able to use the pressed powder much as i bought it in shade-2 , and my skin tends to be quite pale and dry in the winter months , so i find i don't need a powder. From when i have used it , it seems ok , im not that pushed on this product and i wouldn't be in a rush to recommend this anytime soon. Having said that if you need a cheap powder you cant really go wrong with £1 to test it out.

MUA pressed powder shade-2.
£1

Finally , I bought the sleek contour kit in Light. I have been on the hunt for a contour kit for a while and I really like this kit , this product actually reminds me of the Make Up Forver Sculpting kit which a good bit more expensive. I find the colours to blend easily and stay well. I would recommend to apply the darker colour lightly and build it up for a less obvious effect :) For the price this is a really good product and i would highly recommend if your are looking for a contour kit .

Sleek contour kit - Light.
I can't remember what i paid for this in pounds , but it's €7.99 :) 


Thats the end of my little shopping trip to superdrug :) Please excuse the products being in a not so perfect condition as i didn't realise i would be blogging them! I hope you enjoyed my first blog - Im sure ill get better at it soon!
Please leave any comments below :)